How To Remove The Screen From The Peloton Bike: A Step-by-Step Guide
To remove the screen from the Peloton Bike, start by removing the bolt and flipping open the wire clip. Then, carefully take the weight of the monitor and wrap it up for safekeeping.
Alternatively, you can power down and unplug the bike, unplug the monitor cable, and use a Phillips head screwdriver to remove the four monitor screws. This will fully release the touchscreen from the monitor arm, so make sure someone is holding the touchscreen.
Finally, remove the back panel, line the new touchscreen up with the monitor mount, and return the back panel to the touchscreen. Plug in and power on the bike to complete the process.
Tools Required
Phillips head screwdriver
To remove the screen from your Peloton bike, you will need a Phillips head screwdriver. This tool will allow you to unscrew the necessary screws that secure the screen to the bike’s monitor arm. Make sure you have a Phillips head screwdriver on hand before starting the process.Wire clip opener
Another tool that will be helpful in removing the screen from your Peloton bike is a wire clip opener. This tool will allow you to safely flip open the wire clip that holds the monitor cable in place. By using the wire clip opener, you can release the cable without causing any damage or risking injury.New touchscreen (if replacing)
If you are replacing your Peloton bike’s screen, you will need a new touchscreen. This is an optional tool, as it is only necessary if your current screen is damaged or needs to be upgraded. When purchasing a new touchscreen, make sure it is compatible with your Peloton bike model to ensure a proper fit and functionality. Having these tools ready will make the process of removing the screen from your Peloton bike much smoother and more efficient. With the Phillips head screwdriver, wire clip opener, and new touchscreen (if needed), you will be well-equipped to successfully complete the task at hand.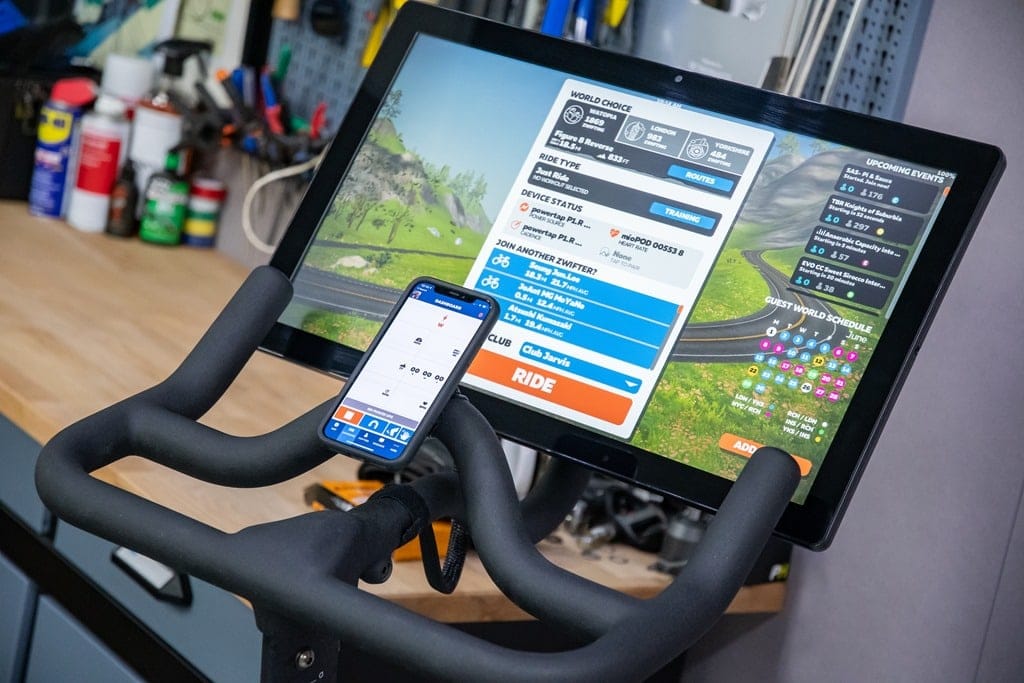
Credit: www.dcrainmaker.com
Step 1: Powering Down And Disconnecting The Bike
Power down the Peloton Bike and unplug it from the power source.
Before you can remove the screen from your Peloton Bike, it’s important to power it down and disconnect it from the power source. This ensures safety and prevents any electrical accidents. Follow these steps:
- Locate the power button on the back of the Peloton Bike.
- Press and hold the power button for a few seconds until the screen and console turn off. This fully powers down the bike.
- Unplug the bike from the power source. This can be done by gently pulling out the power cord from the wall socket or power strip.
By powering down and disconnecting the bike, you are ready to safely move on to the next step of removing the screen from your Peloton Bike.
Step 2: Removing The Monitor Cable
Once you have located the monitor cable at the back of your Peloton bike, it is time to carefully unplug the cable. This step is crucial in the process of removing the screen from your bike. Follow the steps below to ensure a smooth and successful removal:
Locate the monitor cable at the back of the bike
To remove the screen from your Peloton bike, you first need to locate the monitor cable at the back of the bike. The monitor cable is responsible for transmitting data and power to the screen. Look for a cable protruding from the back of the screen and follow it to where it connects to the bike.
Carefully unplug the monitor cable from the bike
Now that you have located the monitor cable, it’s time to proceed with removing it. With caution and a gentle hand, firmly grasp the connector where the monitor cable is attached to the bike. Apply steady pressure while pulling the connector straight out of its port. Do not twist or jerk the cable, as this may damage the connectors or the cable itself.
Once the monitor cable is disconnected from the bike, you can move on to the next step in the process of removing the screen from your Peloton bike. Ensure that the cable is placed in a safe spot where it won’t get tangled or damaged. Wrapping it up neatly or using cable ties can help keep it organized.
By carefully following these steps, you can remove the screen from your Peloton bike easily and safely. Now you can proceed with any necessary repairs or modifications, or simply store the screen separately for convenience. Remember to exercise caution during the entire removal process to avoid any accidental damage to your Peloton bike.
Step 3: Unscrewing The Monitor
Now that you have successfully unplugged the monitor cable in Step 2, it’s time to remove the screen from the Peloton bike. This step requires the use of a Phillips head screwdriver and ensuring someone is holding the touchscreen to prevent it from falling.
Use a Phillips head screwdriver to remove the four screws securing the monitor to the bike.
Grab your Phillips head screwdriver and locate the four screws that are securing the monitor to the bike. These screws hold the monitor in place and need to be removed in order to detach it from the bike.
- Position the Phillips head screwdriver on the head of the first screw.
- Apply firm but gentle pressure to turn the screwdriver in a counterclockwise motion.
- Repeat this process for the remaining three screws, ensuring all screws are completely loosened.
Ensure someone is holding the touchscreen to prevent it from falling.
With the screws removed, it’s important to have someone hold the touchscreen securely. This will prevent it from accidentally falling and getting damaged during the removal process.
It’s crucial to note that the touchscreen is a delicate component, and any mishandling can result in costly repairs or replacements. So, make sure to assign someone to support the touchscreen throughout the rest of the screen removal process.
Once you have completed these steps, you are ready to move on to the next phase of disassembling your Peloton bike. Stay tuned for Step 4, where we will guide you through detaching the monitor from the bike completely.
Step 4: Detaching The Touchscreen From The Monitor Arm
Once you have successfully removed the back panel, it’s time to detach the touchscreen from the monitor arm. This step requires a bit of caution, as the touchscreen is a delicate component of the Peloton Bike. Follow the instructions below to gently detach the touchscreen from the monitor arm.
Gently detach the touchscreen from the monitor arm
To remove the touchscreen from the monitor arm, follow these steps:
- Ensure that someone is holding the touchscreen while you perform the following steps to prevent it from accidentally falling.
- Locate the four monitor screws that are holding the touchscreen in place.
- Using a Phillips head screwdriver, carefully remove the four monitor screws. Make sure to keep them in a safe place for reassembly later.
- Once the screws are removed, the touchscreen will be fully released from the monitor arm. Take caution while lifting it off to prevent any damage.
It’s important to handle the touchscreen with care to avoid any scratches or cracks. Take your time during this step and ensure that the touchscreen is detached smoothly.
With the touchscreen now detached from the monitor arm, you can proceed with other steps to disassemble or transport your Peloton Bike as needed. Make sure to keep all the removed components in a safe place to reassemble them correctly later.
Step 5: Removing The Back Panel
REMOVE THE BACK PANEL OF THE TOUCHSCREEN
To successfully remove the back panel of your Peloton Bike’s touchscreen, follow these steps: 1. Start by gathering the necessary tools: a Phillips head screwdriver. 2. Power down and unplug your Peloton Bike to ensure safety during the process. 3. Locate the monitor cable that connects the touchscreen to the bike. Unplug the cable from the bike’s monitor arm. 4. Use a Phillips head screwdriver to remove the four monitor screws. By doing this, you fully release the touchscreen from the monitor arm. 5. It’s important to have someone hold the touchscreen during this step, as removing the screws might loosen the grip on the screen and potentially cause it to fall down. 6. Once the screws are removed, carefully remove the back panel of the touchscreen. You may need to apply gentle pressure to release it from the monitor arm. 7. Now that you have successfully removed the back panel, you can proceed with replacing or repairing the touchscreen, if necessary. 8. To reinstall the touchscreen, simply line it up with the monitor mount and secure it in place. 9. Return the back panel to the touchscreen, making sure it fits snugly. 10. Finally, plug in the monitor cable and power on your Peloton Bike to test if the touchscreen is functioning properly. By following these simple steps, you can remove the back panel of your Peloton Bike’s touchscreen and make any necessary repairs or replacements. Remember to take all the necessary precautions to ensure your safety throughout the process.Step 6: Replacing The Touchscreen (If Necessary)
If you find that your Peloton bike’s touchscreen needs to be replaced, don’t worry, it’s a relatively simple process. Here’s how you can replace the touchscreen on your Peloton bike:- Power down and unplug the bike.
- Unplug the monitor cable from the back of the bike.
- Using a Phillips head screwdriver, remove the four screws that hold the monitor in place. This will fully release the touchscreen from the monitor arm, so make sure someone is holding the touchscreen to prevent it from falling.
- Remove the back panel of the touchscreen.
- Line up the new touchscreen with the monitor mount, ensuring that it is centered and aligned correctly.
- Return the back panel to the touchscreen, securing it back in place.
- Plug in and power on the bike to test if the new touchscreen is functioning properly.
Step 7: Reattaching The Back Panel To The Touchscreen
After successfully removing the screen from your Peloton Bike, it’s now time to reattach the back panel to the touchscreen. This step is crucial to ensure the stability and functionality of your Peloton Bike. Follow the instructions below to complete the process.
Carefully return the back panel to the touchscreen.
1. Take the back panel and align it with the touchscreen, ensuring that all the necessary connectors are lined up properly.
2. Gently press the back panel against the touchscreen, ensuring a secure fit. Be cautious not to apply excessive force to avoid damaging any components.
3. Once the back panel is properly aligned and pressed against the touchscreen, you can proceed to the next step in reassembling your Peloton Bike.
It is important to note that if you encounter any difficulties during this process, it’s recommended to consult the official Peloton support or contact a professional technician with experience in Peloton Bike repair.
By following these steps, you can confidently reattach the back panel to the touchscreen of your Peloton Bike. Now, you’re one step closer to enjoying your next workout session.
Step 8: Connecting The Monitor Cable
Step 8: Reconnect the monitor cable to the bike.
After removing the screen from your Peloton bike, the next step is to reconnect the monitor cable. This cable ensures that the screen functions properly and displays all the important metrics and data during your workouts. Follow the steps below to easily reconnect the monitor cable:- Locate the monitor cable port on the back of the screen.
- Take the monitor cable and align the connectors properly.
- Gently push the cable into the port until you hear a slight click or feel it securely fit into place.
- Make sure the cable is not loose and that the connection is tight.
Step 9: Powering Up The Bike
Now that you have successfully removed the screen from your Peloton Bike, it’s time to power it up again and get back to your workout routine. Follow these steps to ensure a smooth and efficient process:Plug the Peloton Bike back into the power source
The first thing you need to do is plug your Peloton Bike back into the power source. Locate the power cord and insert it into the power outlet. Make sure the connection is secure to avoid any disruptions during your workout.Power it up again
Once the bike is plugged in, it’s time to power it up again. Look for the power button on the bike and press it to turn it on. You should see the screen light up and the Peloton logo appear. Give it a few seconds to boot up completely. Now that your Peloton Bike is powered up again, you can start enjoying your workouts and keep up with your fitness goals. Remember to follow the recommended safety guidelines and proper maintenance procedures for optimal performance. Happy cycling! In conclusion, powering up your Peloton Bike after removing the screen is a straightforward process. Just plug it back into the power source and press the power button to turn it on. With these simple steps, you’ll be back to enjoying your workouts in no time.Frequently Asked Questions On How To Remove The Screen From The Peloton Bike?
Can You Remove The Screen From The Peloton Bike?
Yes, you can remove the screen from the Peloton bike. Take off the monitor bolt, flip open the wire clip, and carefully lift the weight of the monitor. Wrap it up before moving. You can also follow instructional videos on YouTube for a step-by-step guide.
How Do I Remove Peloton Row Screen?
To remove the screen from your Peloton Bike, follow these steps: 1. Power off the bike and unplug the power cord from the wall. 2. Unplug the data cable from the screen. 3. Tilt the screen up as far as it will go.
4. Slide out the screen from the monitor neck. 5. Make sure to hold the screen securely during the process. That’s it! Now you can easily remove the screen from your Peloton Bike.
How Do You Take Apart A Peloton Bike?
To take apart a Peloton bike, follow these steps: 1. Power down and unplug the bike. 2. Remove the bolt holding the monitor in place. 3. Flip open the wire clip. 4. Take the weight of the monitor as you detach it.
5. Wrap it up and secure it. 6. Use a Phillips head screwdriver to remove the four monitor screws. 7. Fully release the touchscreen from the monitor arm while someone holds it. 8. Remove the back panel. 9. Align the new touchscreen with the monitor mount.
10. Replace the back panel and plug in and power on the bike. Source: Toronto Movers YouTube, Peloton YouTube, Steve Julien YouTube, Christopher Lum YouTube
How Do You Move The Peloton Screen?
To move the Peloton screen, follow these steps: 1. Remove the bolt holding the screen. 2. Flip open the wire clip. 3. Take the weight of the screen and wrap it up. 4. Power down and unplug the bike. 5. Unplug the monitor cable.
6. Use a Phillips head screwdriver to remove the four monitor screws. 7. Remove the back panel. 8. Line up the new screen with the monitor mount. 9. Return the back panel to the screen. 10. Plug in and power on the bike.
Conclusion
To remove the screen from your Peloton Bike, simply follow the steps mentioned in the blog post. Take off the monitor carefully by removing the necessary bolts and screws. Unplug the cables and slide out the touch screen from the monitor arm.
Make sure to have someone hold the touchscreen to avoid any accidents. With these easy steps, you can safely remove the screen and continue with any maintenance or upgrades you have planned.