How To Delete Your Peloton Account: Step-by-Step Guide
To delete your Peloton Account, log into your Peloton account, go to your profile, navigate to “My Account,” and select “Subscription.” From there, you can cancel your subscription and confirm the cancellation.
Deleting your Peloton account is a simple process that can be done within a few easy steps. Whether you’re no longer using the service or you’ve decided to switch to a different platform, this guide will provide you with the exact instructions on how to delete your Peloton account.
By following these steps, you’ll be able to cancel your subscription and permanently remove your account from the system. So, if you’re ready to move on from Peloton, read on to find out how to delete your account effortlessly.
Step 1: Access Your Peloton Account Settings
Deleting your Peloton account might be a tough decision, but if you’re ready to close it, follow these simple steps to get started. In this step-by-step guide, we’ll walk you through the process of accessing and deleting your account on Peloton.
Log in to your Peloton account:
- Open your web browser and go to the Peloton website.
- Locate and click on the “Log In” button on the top right corner of the homepage.
- Enter your username and password to log into your Peloton account.
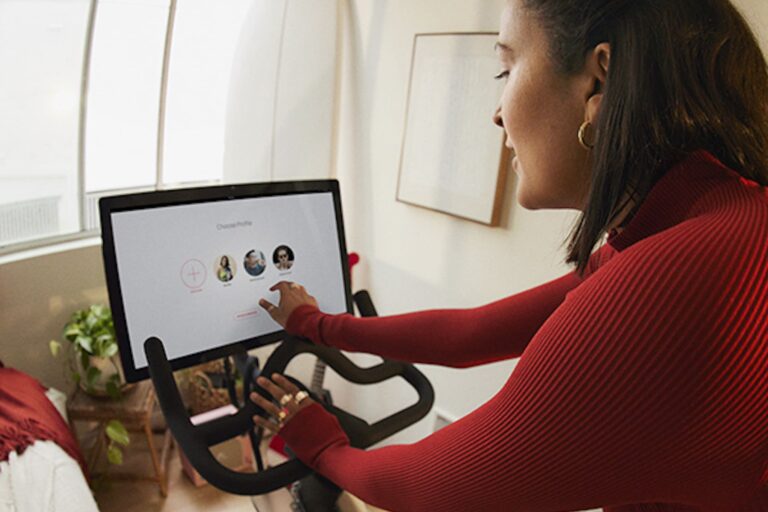
Locate and click on your profile icon:
Once you are logged in to your Peloton account, it’s time to navigate to your account settings to proceed with the deletion process.
- On the top right corner of the screen, you’ll find a profile icon. Click on it to open a drop-down menu.
- In the drop-down menu, you will see various options. Look for and click on the “Settings” option.
At this point, you have successfully accessed your Peloton account settings, and you are ready to move forward with the next steps to delete your account. Make sure you are completely certain about deleting your Peloton account, as this action is irreversible.
Step 2: Navigate To Account Settings
Once you have logged into your Peloton account, it’s time to navigate to the Account Settings page. This is where you can make changes to your account, including deleting it.
In the dropdown menu, select “Account Settings” or similar.
To access the Account Settings page, look for the dropdown menu on the top right corner of the screen. Click on the menu to reveal a list of options. Look for “Account Settings” or a similar option and select it.
Note: The exact wording and location of the Account Settings option may vary slightly depending on the Peloton app version you are using.
By selecting “Account Settings” from the dropdown menu, you will be directed to the page where you can manage various aspects of your Peloton account, including profile information, subscription, and privacy settings.
Pro-tip: If you are having trouble finding the Account Settings option, try using the search function within the app or refer to the Peloton support documentation for more specific instructions based on your device and app version.
Once you have successfully located and clicked on “Account Settings,” you will be taken to the next step in the process of deleting your Peloton account.
Step 3: Find The Subscription Section
After logging into your Peloton account and accessing your profile, it’s time to take the next step towards deleting your account. Scroll down until you find the “Subscription” section. This is where you’ll be able to manage your membership and ultimately cancel it.
To make it easier for you, here’s a step-by-step guide:
- Log into your Peloton account.
- Go to your profile.
- Scroll down until you see the “Subscription” section.
- Select the “Subscription” option.
- In the subscription settings, you’ll find the option to cancel your membership.
- Confirm the cancellation.
Remember, once you confirm the cancellation, your Peloton account and all associated data will be permanently deleted. Make sure to consider this decision carefully as it cannot be undone.
If you encounter any difficulties or have any questions during this process, don’t hesitate to reach out to the Peloton support team. They will be happy to assist you in resolving any issues you may encounter.

Credit: www.mcafee.com
Step 4: Cancel Your Subscription
If you’re ready to cancel your Peloton account and end your subscription, you can easily do so by following these steps:
Click on the “Cancel Subscription” or similar button
First, log into your Peloton account and navigate to your profile. Look for the “My Account” section and locate the “Subscription” option. Click on it to access your subscription settings.
Follow the prompts to confirm the cancellation
Once you’re in the subscription settings, you should see a button that says “Cancel Subscription” or something similar. Click on it to initiate the cancellation process. You may be asked to confirm your decision before proceeding.
After confirming the cancellation, your Peloton subscription will be cancelled, and you will no longer have access to the premium features and content.
It’s important to note that cancelling your subscription doesn’t automatically delete your Peloton account. If you want to permanently delete your Peloton account, you need to fill out the Privacy Request Form provided by Peloton’s Privacy Team. Once the form is submitted, they will process your request and delete your account accordingly.
Step 5: Fill Out The Privacy Request Form
To permanently delete your Peloton account, follow these steps to fill out the privacy request form:Access the Peloton Privacy Request Form
1. Click here to access the Peloton privacy request form.Select “Deletion/Erasure” under “Select Request Type.”
2. On the privacy request form, locate the “Select Request Type” section and click on the drop-down menu. 3. From the options provided, select “Deletion/Erasure” to indicate that you want to delete your Peloton account.Complete the form with the necessary details.
4. Fill out the requested information on the form, including your personal details such as name, email address, and Peloton username. 5. Provide any additional information as required, ensuring that all the required fields are filled in accurately. 6. Double-check your information to ensure its accuracy before submitting the form. Once the form is completed, the Peloton Privacy Team will start processing your request. Please note that it may take some time for your request to be fully processed.Step 6: Submit Your Request
Once you have made the decision to delete your Peloton account, it’s time to submit your request. To begin the process, you need to fill out the Peloton Privacy Request Form. Let’s break down the steps:
Submit the Privacy Request Form
To get started, click here to access the Privacy Request Form. On the form, you will need to select “Deletion/Erasure” under the “Select Request Type” section. This ensures that your request is specifically for the deletion of your account. Fill out all the required information accurately and double-check for any errors. Pay attention to the form’s instructions to ensure a successful submission.
The Peloton Privacy Team will begin processing your request
Once you have submitted your request, the Peloton Privacy Team will initiate the account deletion process. It’s important to note that this may take some time, as the team needs to validate and verify the request before proceeding. During this process, refrain from accessing your Peloton account as it may interfere with the deletion process. Ensure that you have logged out of all Peloton devices and apps to avoid any complications.
Remember to be patient during this stage as the Peloton Privacy Team works diligently to process your request accurately and efficiently. In the meantime, avoid creating any new content or making changes to your existing account to avoid potential conflicts.
Once your request has been successfully processed, you will receive confirmation from the Peloton Privacy Team regarding the deletion of your account. At this point, you will no longer have access to your Peloton account, its associated features, and the services provided by Peloton. If you wish to rejoin in the future, you will need to create a new account.
Deleting your Peloton account is a significant decision, and it’s essential to follow each step carefully to ensure proper account deletion. By submitting your request through the Privacy Request Form, you are on the path to permanently deleting your account and removing your personal information from Peloton’s database.
Step 7: Wait For Confirmation
Wait for the Peloton Privacy Team to confirm the deletion of your account.
After submitting the Privacy Request Form for the deletion of your Peloton account, the final step is to wait for confirmation from the Peloton Privacy Team. They will begin processing your request and verify the deletion of your account. This process may take some time, so it’s important to be patient during this stage. While you wait for confirmation, it’s essential to avoid logging into your Peloton account or initiating any further activity on the platform. This ensures that the deletion process is not interrupted and your account is successfully removed from Peloton’s systems. During this waiting period, it’s a good idea to keep track of your email inbox. The Peloton Privacy Team will communicate with you via email to confirm the deletion of your account. When you receive this confirmation, make sure to review the email thoroughly and follow any instructions provided by Peloton. In case you don’t receive any confirmation within a reasonable time frame, you can contact Peloton’s customer support for further assistance. They will be able to address any concerns or queries you may have regarding the deletion process. Remember, once you receive confirmation that your account has been deleted, it cannot be reinstated. Therefore, it’s crucial to double-check that you no longer require access to your Peloton account before proceeding with the deletion request. In conclusion, after submitting the Privacy Request Form, patiently wait for the Peloton Privacy Team to provide confirmation of the deletion of your account. Keep an eye on your email inbox for any notifications and avoid logging into your account during this waiting period. If you encounter any issues or haven’t received confirmation within a reasonable time, don’t hesitate to reach out to Peloton’s customer support for further assistance.Step 8: Verify Deletion
After submitting your account deletion request, it is important to check your email for a confirmation of the account deletion. Follow the steps below to verify that your Peloton account has been successfully deleted:
Check your email for a confirmation of the account deletion
1. Open your email inbox and look for an email from Peloton.
2. Open the email and carefully read its contents.
3. Look for a confirmation message stating that your Peloton account has been successfully deleted.
4. If you do not see the confirmation email in your inbox, check your spam or junk folder.
5. If the email is still not found, wait for a few minutes and check your inbox again.
6. Once you have located the confirmation email, open it to ensure that your account has been permanently deleted.
Confirmation email example
| Subject | Sender | Date |
|---|---|---|
| “Account Deletion Confirmation – Peloton” | no-reply@peloton.com | September 10, 2022 |
In the confirmation email, you should see a message similar to the following:
“Dear [Your Name],
Your Peloton account has been successfully deleted. Thank you for using our services.
If you have any further inquiries, please feel free to contact our support team.
Best regards,
Peloton Support”
By receiving this confirmation email, you can be confident that your Peloton account has been permanently deleted. If you have any concerns or questions, you can reach out to Peloton’s support team for further assistance.
Bonus Tip: Pause Or Modify Your Membership
If you don’t wish to delete your account permanently, you can choose to pause or modify your Peloton membership instead. This option allows you to temporarily suspend your subscription or make changes to it, providing you with flexibility and control over your membership.
If you don’t wish to delete your account permanently, you can choose to pause or modify your membership instead.
To pause your membership, follow these simple steps:
- On your Peloton app or website, navigate to your profile.
- Click on “My Account” and locate the “Subscription” option.
- Select “Subscription” and choose the “Pause” option.
- Confirm the pause request and your membership will be temporarily suspended.
Modifying your membership is just as easy.
If you want to make changes to your Peloton membership, such as upgrading or downgrading your plan, follow these steps:
- Go to your profile on the Peloton app or website.
- Click on “My Account” and find the “Subscription” option.
- Select “Subscription” and choose the “Modify” option.
- Follow the prompts to adjust your plan according to your preferences.
- Confirm the changes and your membership will be updated accordingly.
By choosing to pause or modify your membership, you can take a break from Peloton or customize your subscription to better suit your needs. It’s a convenient and easy way to manage your membership without permanently deleting your account.
Frequently Asked Questions On How To Delete Your Peloton Account
How Can I Cancel My Peloton Membership?
To cancel your Peloton membership, follow these steps: 1. Log into your Peloton account. 2. Go to your profile and click on “My Account. ” 3. Look for the “Subscription” tab and select it. 4. Click on “Cancel Subscription” and confirm the cancellation.
That’s it! Your Peloton membership will be canceled.
How Do I Delete Peloton App Membership?
To delete your Peloton app membership, log into your account and go to your profile. Click on “My Account” and look for “Subscription”. Select “Subscription” and then choose to cancel. Confirm the cancellation and you’re done.
How To Do A Factory Reset On Peloton?
To do a factory reset on Peloton, follow these steps: 1. Log into your Peloton account and go to your profile. 2. Look for “My Account” and select “Subscription”. 3. Cancel the subscription and confirm the cancellation. 4. Fill out the Privacy Request Form to permanently delete your Peloton account.
5. Reactivate at any time using your Peloton Bike, Bike+, Tread, or Guide.
Why Can’T I Cancel My Peloton Membership?
To cancel your Peloton membership, follow these steps: Log into your Peloton account and go to your profile. Then, click on “My Account” and select “Subscription. ” From there, you can cancel your subscription and confirm the cancellation. If you’re using the Peloton app on an Android device, you’ll need to go to the Google Play Store to cancel.
For more information, visit the Peloton website or contact their support team.
Conclusion
To permanently delete your Peloton account, simply fill out our Privacy Request Form by selecting “Deletion/Erasure” under “Select Request Type. ” Our dedicated Peloton Privacy Team will promptly begin processing your request. Your account will be deleted, ensuring a seamless experience for those who no longer wish to use our services.
Thank you for being a part of the Peloton community.